Securing My Cloud Hosted Virtual Machine

So, you've just spun up a shiny new virtual machine on the cloud. The world is your oyster! But it doesn't take long to realize you're not alone. Almost immediately, automated bots from all over the world start knocking on your server's door, constantly scanning for vulnerabilities. This is especially true for services like SSH.
This is where a fantastic open-source tool called fail2ban comes to the rescue. Instead of letting these bots try to guess your password endlessly, fail2ban acts like a smart bouncer. It actively watches your system's log files, and if it spots an IP address failing to log in too many times, it automatically tells the server's firewall to block them. Simple, yet incredibly effective.
Getting started was pretty straightforward. I created a /etc/fail2ban/jail.local file to define my own rules. Initially, I kept it simple for the SSH service:
[sshd]
enabled = true
port    = ssh
logpath = /var/log/secure
maxretry = 5
bantime = 3600
This configuration means that if any single IP address fails to log in 5 times (maxretry), they get a one-hour timeout (bantime = 3600 seconds).
It didn't take long for fail2ban to catch something. I took a peek at the logs for a specific IP that was showing up a lot, and sure enough:
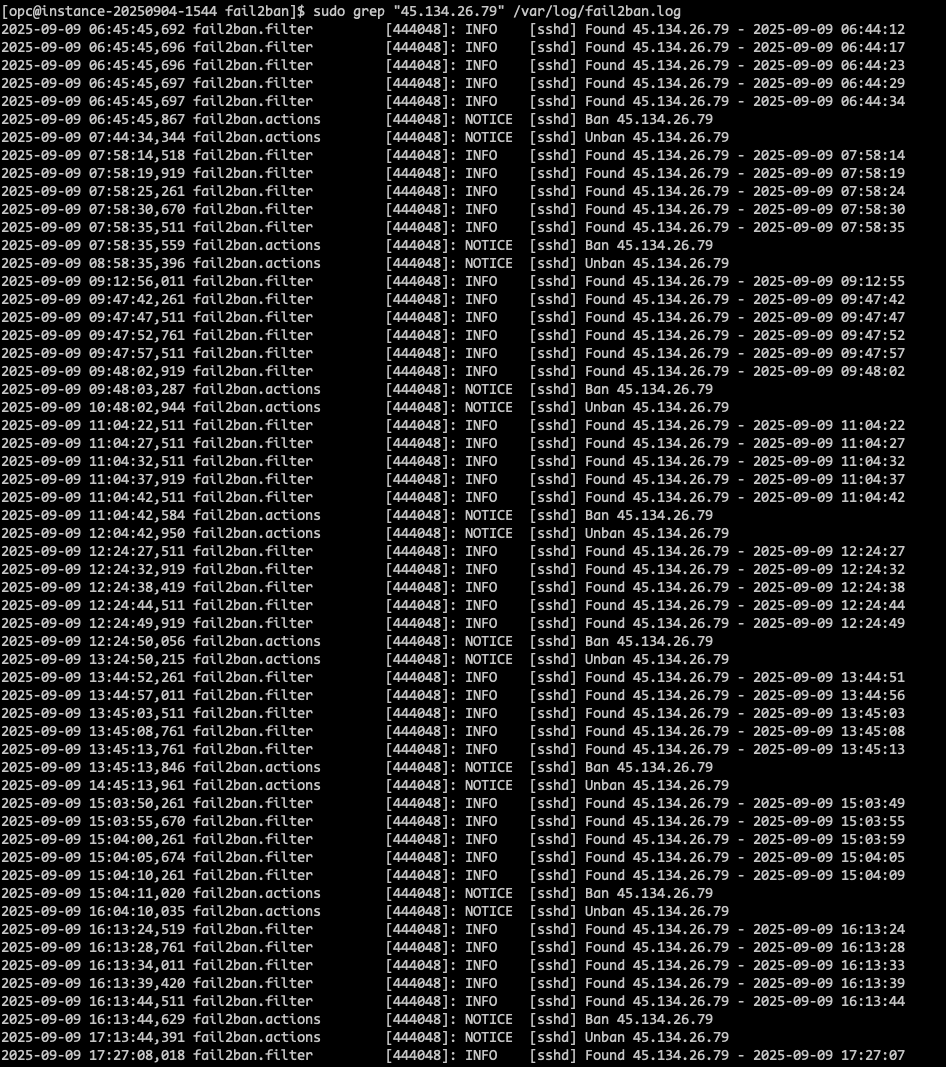
You can see the IP address 45.134.26.79 being found repeatedly. After its fifth failed attempt, fail2ban stepped in and banned it. An hour later, it was unbanned, and like clockwork, the bot started trying again, only to be promptly re-banned. This little dance between my server and the bot happened all day long.
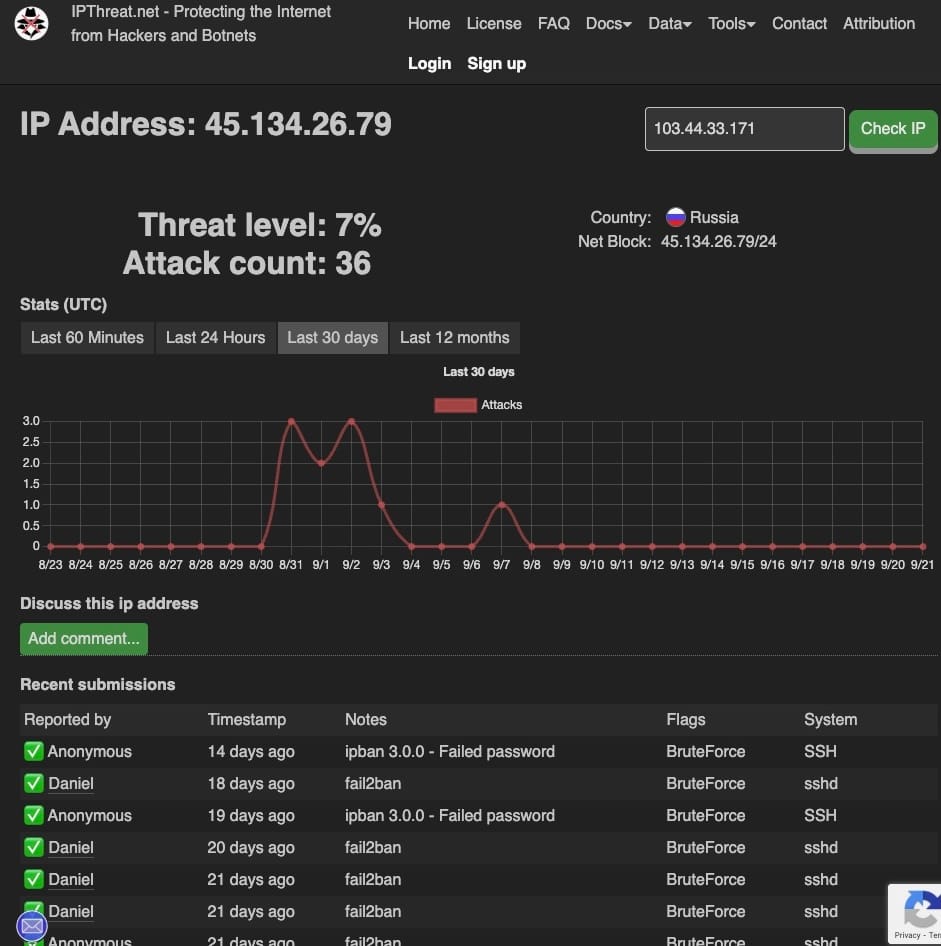
Curiosity got the better of me, so I plugged the IP into a threat intelligence tool, ipthreat.net, to see who this persistent guest was.
The result confirmed my suspicions. The IP was from Russia and was already flagged by others for brute-force SSH attacks. This was the proof: fail2ban wasn't just blocking random mistakes; it was actively protecting my server from a known malicious bot.
Hardening the Rules: Dealing with Repeat Offenders
While a one-hour ban is good, it wasn't enough for this persistent bot. It would just wait out the timer and come right back. It was time to get a bit tougher. I updated my jail.local configuration to be much less forgiving.
First, I increased the standard bantime for SSH to 86400 seconds—a full 24 hours.
More importantly, I enabled the powerful recidive jail. This is the real game-changer. It actually watches the fail2ban log itself for repeat offenders. If the same IP gets banned a few times across different services, the recidive jail issues a much longer-term ban. I set mine to one week!
[sshd]
enabled = true
port    = ssh
logpath = /var/log/secure
maxretry = 5
bantime = 86400

[recidive]
enabled  = true
filter   = recidive
logpath  = /var/log/fail2ban.log
bantime  = 1w        # 1 week
findtime = 1d        # look back 1 day
Now, if that bot comes back, it won't just get a slap on the wrist. After a few daily bans, it will be blocked for an entire week.
Setting up a VM is just the first step. Leaving it exposed to the internet without basic security is like leaving your front door unlocked. Tools like fail2ban are essential for creating that first line of defense, automating the process, and giving you peace of mind.
Bolting the Door: Hardening the SSH Server
While fail2ban does a fantastic job of blocking persistent attackers, it's even better to make the lock on your door harder to pick in the first place. Brute-force attacks are only successful if there's a password they can guess. So, my final measures were to edit the SSH server's main configuration file, /etc/ssh/sshd_config, to tighten up security directly.
There were two main goals:
- Prevent the super-powerful
rootuser from logging in directly. - Disable password-based logins entirely, forcing the use of ultra-secure SSH keys.
1. Disabling Direct Root Login
The root user is the number one target for any attacker. If they can compromise it, they have complete control of the system. The best practice is to always log in as a regular user and then elevate your privileges (e.g., with sudo) when needed.
I found this line in the configuration, which was initially commented out or set to yes:
# Before
#PermitRootLogin yes
And changed it to prohibit-password. This is a strong setting that disables password-based logins for root but still allows logging in with a secure SSH key if needed. For even tighter security, you could set this to no.
# After
PermitRootLogin prohibit-password
This simple change means that no one can even attempt to guess the root password from a remote login, dramatically reducing the attack surface.
2. Enforcing SSH Key-Only Authentication
Passwords can be weak, guessed, or stolen. SSH keys, on the other hand, are a pair of long, complex cryptographic files that are practically impossible to brute-force. Switching to key-only authentication is one of the single most effective security upgrades you can make to your server.
Warning: This is the most important step! Before you disable passwords, you must make sure you have correctly added your SSH public key to your server's ~/.ssh/authorized_keys file and have successfully logged in with it. If you don't, you will lock yourself out of your own server!Once I had confirmed my key worked perfectly, I made the final change. I found the line for PasswordAuthentication and switched it from yes to no.
# Before
#PasswordAuthentication yes
# After
PasswordAuthentication no
After saving the file, these changes don't apply immediately. You have to tell the SSH service to reload its configuration. On most systems, this command does the trick:
sudo systemctl restart sshd
With these two changes, my server is now significantly more secure. Attackers can't log in as root, and they can't even try to guess passwords anymore. Combined with fail2ban automatically blocking the IPs that are still trying to scan my server, I've created a simple but powerful layered defense.